Maintenance and care of equipment is essential to prevent costly repairs and to save unnecessary service calls. In most cases, malfunctions are resolved by operator checks and corrective action. Your wallet will thank you, when the operator has properly checked to determine why devices are not functioning and avoids calling for service to repair or replace a working device.
Before operating the unit, read the manual that was included in the box or download it from the manufacturer website. Otherwise, you may risk damaging the device or voiding the warranty.
PMCS - Preventive Maintenance Checks and Services
Cleaning is the most important step to keep your device working properly. Clean dirty brake rollers, feed rollers, pads, glass, shading plates with a manufacturer cleaning kit or isopropyl alcohol, a lint free cloth, and Q-tips. Also make sure that the paper path is clean and free of debris.
Depending on the condition of documents and environment, the equipment may require a periodic disassembly to fully clean debris, paper clips, staples, dust, etc. that may have worked its way into the insides of the mechanism. The debris can cause a motor to stop running and rollers and belts to jam. Use a shop-vac to vacuum whatever dirt or foreign objects that have worked their way inside the main and side covers. Generally, it is not recommended to blow the scanner out using a compressed can of air. The reason is that the compressed air leaves film on the glass, does not remove the dirt (just blows it around), may break seals and cold air could damage a hot sensor.
CDD (Charge-coupled device) Cameras and CIS (Contact Image Sensor Assembly) Reader
Upon disassembly, the cameras units on devices with CCD cameras should be cleaned. Care should be taken not to damage the cameras as they are usually quite expensive. Canon products are equipped with CIS reader assemblies with a LED light source and the reader assemblies should not be removed or disassembled to avoid damage.
Consumable Replacement
Separator pads and pick rollers should be replaced when worn or according to manufacturer schedule. Shading plates and glass should be inspected and replaced as required. Fluorescent lamps usually require replacement between 500 to 1000 hours of use according to manufacturer guide recommendations. Canon uses a LED light source that usually does not require periodic replacement.
The Scanner System
Systems include not only the scanning devices, but also the computer and operating system as well as the software. There is a tendency to think that problems are mechanical. This is not always the case. In order to resolve the troubles, users may require technical competency. A+ skills and practices should be employed to troubleshoot the system before a service call. The technician is hired to fix the hardware. It is not his job to diagnose computer systems. This is your job or the job your IT department.
Hardware Feed Issues and Poor Scan Quality
Feed issues and poor scan quality are usually corrected through cleaning and replacing worn consumables. Brake and pick rollers should be checked to ensue that they are properly installed. The paper path should also be inspected and any foreign objects removed.
Scanning Software
Common are issues with drivers not found or installed. Re-install the software or make sure that the driver is recognized. Outdated firmware may also cause the equipment to not operate properly. Install the latest firmware. But note installation of incorrect firmware in some cases could permanently damage the main control board. Also, recheck the scan settings to assure that they are set properly.
PC Computer and Operating System
You must assign each SCSI device a separate SCSI ID to avoid an ID conflict. USB and fire wire devices need proper privileges and security rights when connected to a network. The best method to check for problems with the operating system is to swap the computer with another that you know to be working properly.
Troubleshooting and Repair
You can find minor parts that you can fix without too much technical knowledge. For instance check for broken parts and the tension of springs and flat springs. A parts manual can help you identify a problem. Some companies provide diagnostic software. The Canon quma tool provides diagnostic checks of motors, sensors, solenoids and other essential parts.
If you do not have the technical ability, you can buy a service agreement for your scanner. The warranty covers the maintenance and repairs rather than risking a breakdown and costly time and material repairs. Another option is depot repair where you send the equipment to the repair facility which is less costly than on-site services. Some manufacturers only provide a 90 day warranty and the purchase of an extended warranty is recommended.


 I had with me a GPS datalogger. There is a 500m-straight for a quick sprint for 20 seconds up to 150kph before slowing down for a left-hand curve - there is also a gradual sloping up with approx. 50:1 gradient as a slight impediment for the test as shown below.
  [note: the gradient illustration is exergerated by using different scales for x-axis and y-axis. click on the image to enlarge]
 This is part of the logged data. The car hit 100kph just after 9th second from standstill. However based on the car speedometer it took just 8.75secs to hit 100kph. The speedometer of my car probably reads 2-3% higher as I mentioned in earlier post.
 Im quite certain by the time other 1.6~1.8liter N.A automatic tx cars reach 100kph, Peugeot 308THP Auto already hitting 120kph or more!
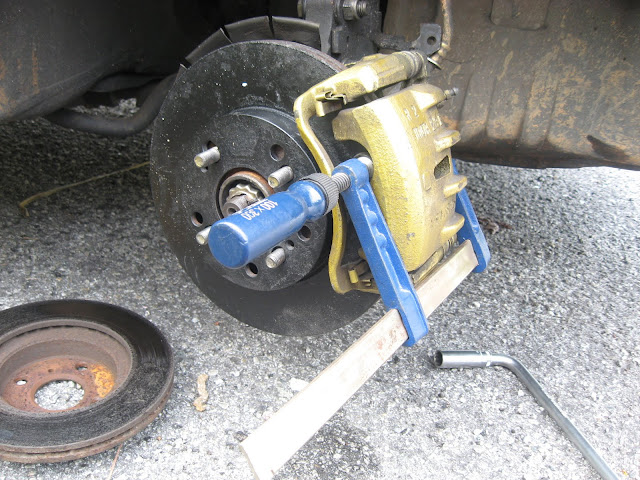
 Here is picture of original disc


 Early morning drag with a stock Honda Civic 2.0.


 I do not have any credible proof that V-Power actually works wonder on normal cars that we drive daily. I found a website/forum mentions that Shell V-Power conforms to RON97 or better...while other website says Shell V-Power is actually
 For time being myPeugeot 308 only use RON-97 and will be using RON-95 for daily driving when the later is available. Nevertheless RON-97 still be used on long distance high-speed, hi-rev spirited driving. Read RON 95 vs RON97.
 Diesel would also be upgraded to European standards, most probably the Euro 2, allowing the introduction of more vehicle models with advanced diesel engines in Malaysia, they added. While it remains below the Euro 4M class of diesel fuel, the Euro 2 diesel has significantly lower sulphur content.


